
HiAce vs Transporter vs Sprinter: Which Van Is Best for a Conversion in Australia?
The Toyota HiAce is the most reliable and easiest van to service across regional Australia. The VW Transporter is the most car-like to drive and park. The Mercedes-Benz Sprinter is the only one of the three that lets most adults stand up inside without a pop-top, making it the pick for full-time vanlife. The right choice depends on how often you travel, where you go and how much space you need.
Key Takeaways
- Toyota HiAce: best all-rounder. Reliable, rear-wheel drive and serviceable in almost every Australian town.
- VW Transporter: best daily driver. Compact, comfortable and easy to park, but has the smallest interior.
- Mercedes Sprinter: best for full-time living. High-roof models give genuine stand-up headroom.
- The HiAce and Transporter need a pop-top for standing room, so budget for one from the start.
- Always check the van’s GVM (gross vehicle mass) against the weight of your finished build, water, gear and passengers.
- Pop-tops, extra seats and structural changes may need engineering certification before registration.
This guide compares the three most popular conversion vans in Australia on the things that matter for a build: interior space, headroom, drivetrain, reliability, running costs and how well each copes with Australian roads. It also covers which van suits which kind of traveller, compliance considerations and what to check before you buy.
Why Your Base Van Matters
The base van decides your layout, your budget and how comfortable you will be for years. It is the one part of a campervan conversion you cannot easily change later, so it pays to choose carefully before you buy a single sheet of plywood.
Four questions narrow the choice quickly:
- Headroom: do you need to stand up inside, or is a pop-top acceptable?
- Length: do you want a fixed bed, a kitchen and a bathroom, or just a bed and storage?
- Where you travel: will you mostly stay near cities, or head into remote areas where parts and mechanics are scarce?
- Budget: how much can you spend on the van, the build and ongoing servicing combined?
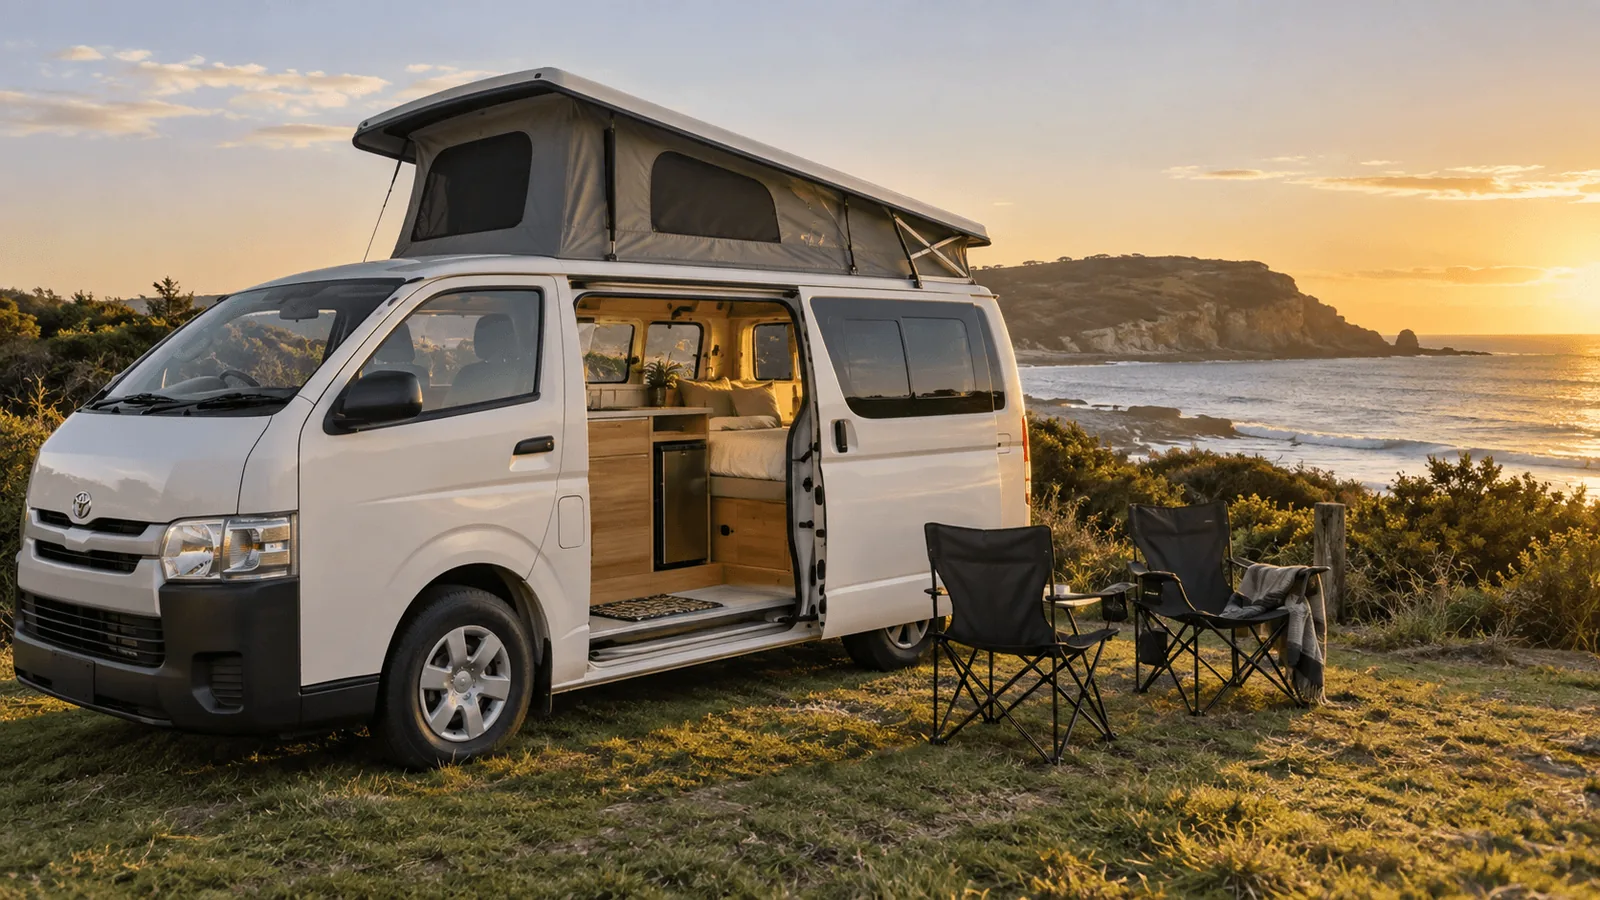
Toyota HiAce: The Reliable All-Rounder
The Toyota HiAce is Australia’s best-known workhorse van, and that is exactly why so many converters choose it. It is tough, simple and easy to service almost anywhere, from Broome to Bairnsdale.
The current generation is sold in long-wheelbase (LWB) and super-long-wheelbase (SLWB) versions, with a turbo-diesel engine and rear-wheel drive. Most adults cannot stand upright inside, so the majority of HiAce conversions add a pop-top roof.
The HiAce has a huge aftermarket in Australia. Pop-tops, campervan fit-outs, flares, suspension upgrades and conversion parts are widely available, which keeps build costs and lead times down.
HiAce Pros
- Excellent reliability reputation and strong resale value
- Parts and mechanics available in almost every regional town
- Rear-wheel drive handles heavy loads and gravel roads well
- Large local aftermarket of conversion parts and pop-tops
HiAce Cons
- No stand-up headroom without a pop-top
- Narrower interior than the Sprinter, so beds usually run lengthways
- Used prices stay high because demand is strong
Best choice: HiAce. Couples and solo travellers who want a dependable van for weekends and lap-of-Australia trips, and who are happy to add a pop-top for headroom.
VW Transporter: The Car-Like Cruiser
The Volkswagen Transporter has decades of camper history behind it and is still the van that feels most like driving a car. It is compact enough for city streets, underground car parks and tight campsites, which makes it a strong choice if the van is also your daily driver.
Front-wheel drive is standard, with 4MOTION all-wheel drive available on some models. Focus RV regularly completes VW pop-top and awning installations. Note that the newest-generation Transporter shares its platform with the Ford Transit Custom, so confirm exactly which model you are comparing when looking at new and used vans.
Transporter Pros
- Comfortable, quiet and easy to drive and park
- 4MOTION all-wheel drive available on some models
- Classic camper styling and a strong enthusiast community
- Pop-top conversions are well established
Transporter Cons
- Smallest interior of the three, so storage is tight
- Needs a pop-top for standing room
- Parts and repairs can cost more than the HiAce, and regional servicing is patchier
Best choice: Transporter. Weekend adventurers and couples who want one vehicle for both the school run and the long weekend away.
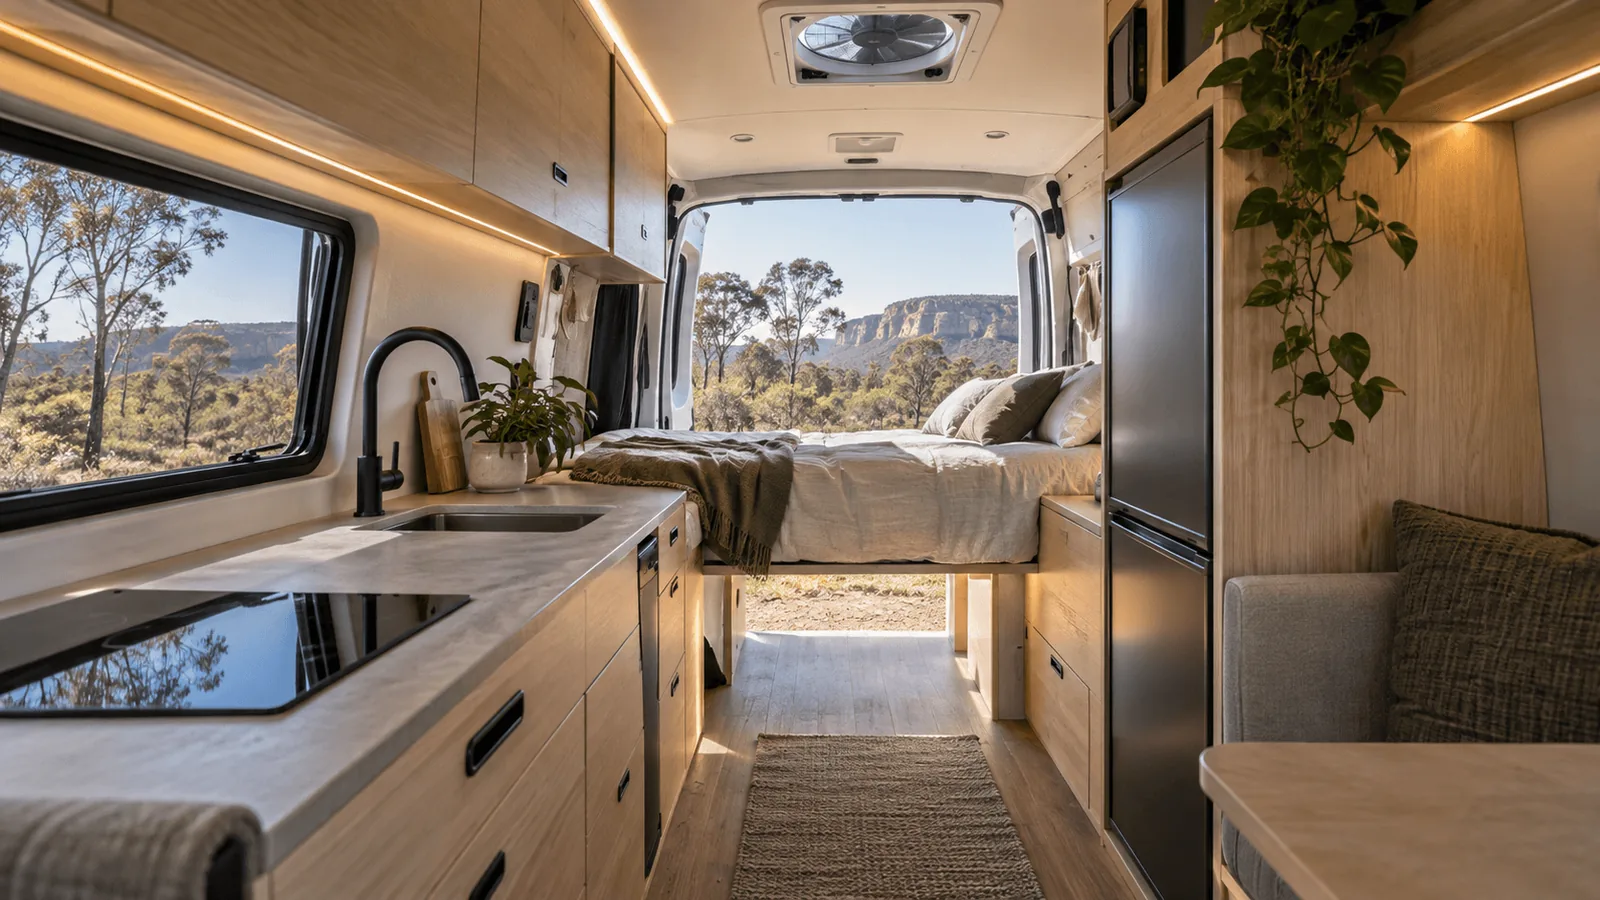
Mercedes-Benz Sprinter: The Full-Size Home
The Sprinter is the van most full-time vanlifers aim for. In high-roof form most adults can stand up inside, and the longer versions have room for a fixed bed, a proper kitchen, a bathroom and even a second sleeping area, plus space for larger lithium batteries and a battery management system.
It comes in several lengths and roof heights, with rear-wheel drive and all-wheel or four-wheel-drive variants. The trade-off is cost: the Sprinter is the most expensive of the three to buy, service and repair, and servicing is mostly limited to Mercedes-Benz dealers and specialists.
Sprinter Pros
- Genuine stand-up headroom in high-roof models
- Most space for layouts, storage, water tanks and batteries
- Refined and comfortable on long highway drives
- 4×4 variants for serious off-road touring
Sprinter Cons
- Highest purchase, servicing and repair costs
- Specialist servicing can be hard to find in remote areas
- Harder to park and too tall for many car parks and drive-throughs
- A bigger build means a bigger budget and more weight to manage
Best choice: Sprinter. Full-time or long-term travellers, families and anyone who wants a true home on wheels with standing room.
HiAce vs Transporter vs Sprinter at a Glance
| Toyota HiAce | VW Transporter | Mercedes Sprinter |
|---|---|---|
|
|
|
Key Differences Between the HiAce, Transporter and Sprinter
The biggest difference is headroom: only the high-roof Sprinter lets most adults stand up without a pop-top. After that, the choice comes down to size, drivetrain and how easily you can get the van serviced where you travel.
| Feature | Toyota HiAce | VW Transporter | Mercedes Sprinter |
|---|---|---|---|
| Size class | Mid-size (LWB, SLWB) | Compact / mid-size | Large (multiple lengths and roofs) |
| Stand-up headroom | No, pop-top recommended | No, pop-top needed | Yes, high-roof models |
| Drivetrain | Rear-wheel drive | FWD, 4MOTION AWD option | RWD, AWD / 4×4 variants |
| Reliability reputation | Excellent | Good | Good, costly repairs |
| Regional servicing | Easiest | Moderate | Limited to dealers / specialists |
| Aftermarket parts | Very large | Large | Large |
| Purchase and running cost | Moderate | Moderate to high | Highest |
| Parking and city driving | Easy | Easiest | Hardest |
| Best for | Touring, remote travel | Daily driver, weekends | Full-time living, families |
Prices and specifications change with each model year. Check current figures with a dealer before you buy.
Which Van Suits Your Travel Style?
The HiAce suits long touring trips on a sensible budget. The Transporter suits people who drive their van every day. The Sprinter suits anyone living on the road full-time. Here is how they compare across the most common scenarios.
Weekend Getaways
Best choice: VW Transporter or Toyota HiAce. Both are easy to drive, fit in normal car parks and make great weekend campers with a pop-top. Choose the Transporter if the van doubles as your everyday car, or the HiAce if you want the toughest, simplest option.
Lap of Australia
Best choice: Toyota HiAce. Reliability and easy access to parts matter more than luxury when you are thousands of kilometres from a city. The HiAce can be serviced almost anywhere, and its rear-wheel drive copes well with heavy loads and gravel roads.
Full-Time Vanlife
Best choice: Mercedes Sprinter. Standing room makes a huge difference when the van is your home. The Sprinter has space for a fixed bed, full kitchen, shower or toilet and plenty of battery and water capacity.
Families
Best choice: Mercedes Sprinter. Longer Sprinter models have room for extra sleeping space and additional seating. Any seat used while driving must be properly anchored and fitted with compliant seatbelts.
Off-Road and Remote Travel
Best choice: HiAce or Sprinter 4×4. The Sprinter 4×4 is the most capable off the beaten track, but the HiAce is easier and cheaper to repair remotely. Many travellers weigh capability against the risk of waiting days for specialist parts.
Can You Add a Pop-Top to a HiAce or Transporter?
💡 Tip: A pop-top solves the headroom problem. Pop-top roofs are the most common way to add standing room to a HiAce or Transporter. They lift to give standing height at camp and fold down for driving, keeping the van low enough for car parks and garages.
A pop-top is a structural modification because it involves cutting the roof. In many states it needs to be installed by a qualified fitter and may require engineering certification before the van is roadworthy. Melbourne travellers can talk to the team about campervan conversions in Melbourne, including pop-top installs.
Include the pop-top in your budget from day one, and ask the installer whether their product comes with the certification paperwork your state requires.
Check the GVM Before You Buy
Every van has a GVM (gross vehicle mass), the maximum it can legally weigh fully loaded. The payload you can carry is the GVM minus the van’s tare (empty) weight.
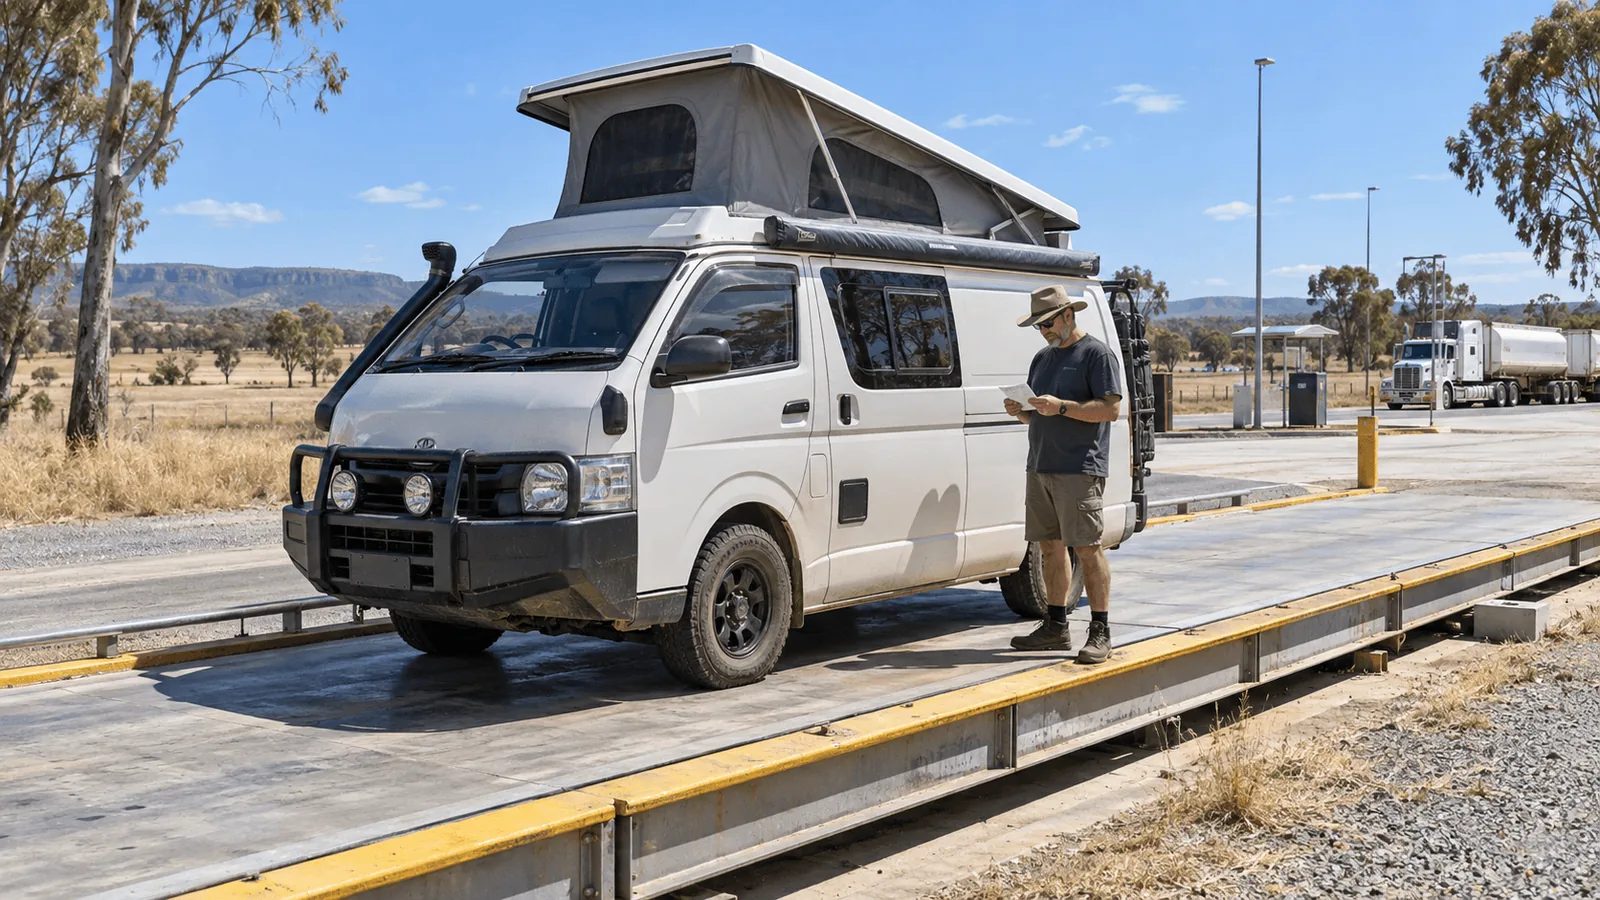
Your finished build, water, fuel, gear and passengers must all stay under the GVM. Weigh your van at a public weighbridge once it is built and packed. Driving over GVM is unsafe and may breach Australian road rules and void your insurance.
Water is heavy. Every litre weighs about 1 kg, so a 100-litre tank adds roughly 100 kg when full.
Batteries, timber and appliances add up fast. Choose lighter materials where you can, especially in smaller vans with less payload.
Some vans can have their GVM increased through an approved upgrade. Check with a specialist before you rely on this.
Compliance and Registration in Australia
A campervan conversion changes your vehicle, and some changes need approval before the van can be registered. Requirements vary between states and territories, so always check with your state road authority before you start building.
Modifications to light vehicles in Australia are guided by Vehicle Standards Bulletin 14 (VSB 14). Common items that may need certification include pop-tops, added or relocated seats, structural changes and GVM upgrades.
| Item | Who Does It | Why It Matters |
|---|---|---|
| Pop-top or roof cut | Qualified installer/engineer | Structural change to the body |
| Extra seats and seatbelts | Licensed installer, engineer sign-off | Occupant safety in a crash |
| Fixed LPG gas system | Licensed gas fitter | Gas compliance certificate required |
| 240-volt electrics | Licensed electrician | Electrical safety compliance |
| GVM upgrade | Approved provider | Legal weight limit changes |
| Re-registering as a motorhome | State road authority | Insurance and registration category |
Have questions about compliance for your build? See the Focus RV FAQs or contact the team. Keep every receipt, certificate and engineering report together. They make registration, insurance and resale much easier.
Tips Before You Buy
- Get a pre-purchase inspection. Look for rust, service history and signs of hard commercial use, especially on ex-fleet vans.
- Rent before you buy. A weekend in a hired campervan shows you what size and layout you really need.
- Test drive with a load. A van feels very different fully built and packed than it does empty on a dealer’s lot.
- Plan the layout first. Measure your must-haves (bed length, fridge, storage) before choosing the van, not after.
- Budget for the whole build. The van is only part of the cost. Include the pop-top, electrics, insulation and certification.
Campervan Conversions at Focus RV
Focus RV is a Melbourne-based caravan and RV specialist in Campbellfield. The team designs and builds complete and partial campervan conversions across all three vans in this guide, plus other popular platforms.
Frequently Asked Questions
Which van is best for a campervan conversion in Australia?
For most Australian travellers, the Toyota HiAce is the best all-round choice because of its reliability and easy servicing. The Mercedes Sprinter is best for full-time living, and the VW Transporter is best if you also use the van every day.
Can you stand up in a Toyota HiAce?
Most adults cannot stand upright in a standard HiAce. A pop-top roof is the most common way to add standing room.
Is a Sprinter worth the extra cost?
It is if you plan to live in your van or travel for long periods. Standing room and extra space make daily life much more comfortable. For weekend trips, a HiAce or Transporter is usually better value.
Do I need engineering certification for a campervan conversion?
It depends on the modifications and your state. Pop-tops, added seats, structural changes and GVM upgrades commonly need certification. Check with your state road authority before you start.
How much weight can a campervan carry?
Subtract the van’s tare weight from its GVM to find the payload. Your build, water, gear and passengers must all fit within that figure.
Is the HiAce or Transporter better for a pop-top conversion?
Both are well suited to pop-tops. The HiAce offers easier regional servicing and a large aftermarket, while the Transporter is more comfortable as a daily driver.
How Caravan Insurance Repairs Work: A Step-by-Step Guide
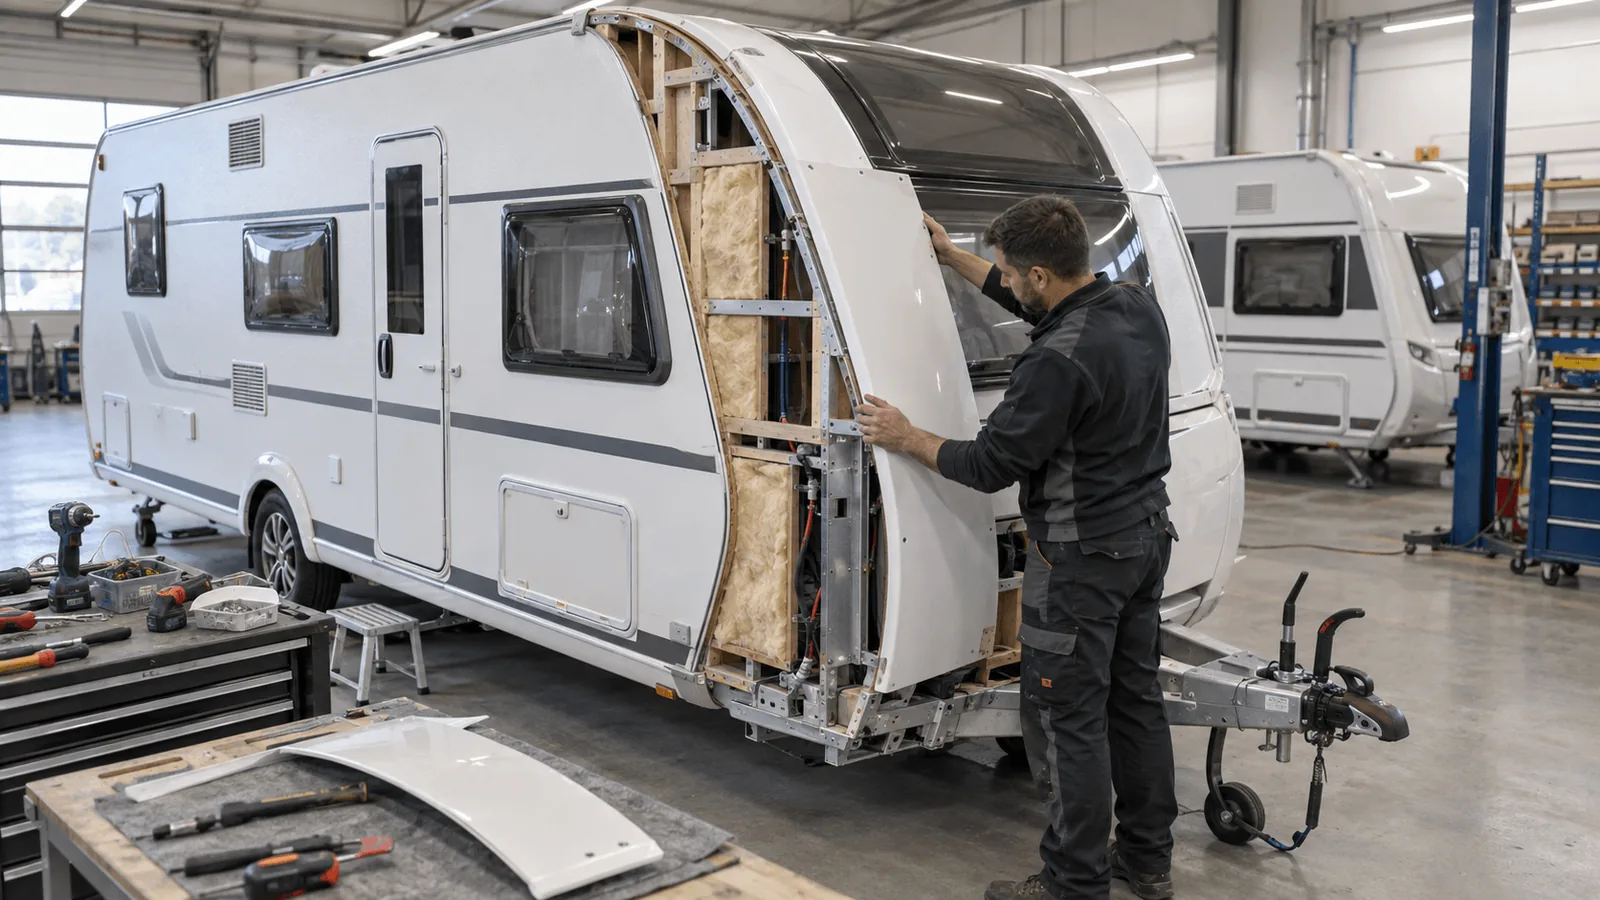
A caravan insurance repair follows a simple sequence: you make the van safe, record the damage and notify your insurer. Then a repairer assesses the damage and sends a quote to the insurer. Once the insurer approves it, parts are ordered, the repairs are completed, and your caravan is returned ready for the road. Knowing each step helps you avoid delays and get your van back sooner.
Key Takeaways
- Notify your insurer as soon as possible after the damage. This step is always the owner’s responsibility.
- Take clear photos of the damage, the scene and any other vehicles before anything is moved or repaired.
- The repairer assesses and photographs the damage, then prepares a quote for your insurance company.
- Repairs start only after the insurer approves the quote.
This guide walks you through the full caravan insurance repair process, from the moment damage happens to the day you collect your repaired van. It covers what you need to do, what the repairer and insurer do, and how to keep your claim moving. See caravan insurance repairs at Focus RV for how the process works in Melbourne.
What Is a Caravan Insurance Repair?
A caravan insurance repair is a repair paid for, in whole or in part, by your insurer after an insured event such as an accident, storm, hail or theft. Instead of paying the full cost yourself, you lodge a claim and the insurer approves and funds the repair, minus any excess.
The repair itself is carried out by a caravan repair specialist. The repairer assesses the damage, quotes the work to your insurer and completes the repairs once they are approved. Experience with caravans matters here, because their construction, chassis, electrics and gas systems are very different from those of a car.
Your Role vs the Repairer’s Role at a Glance
| Your Role | Repairer’s Role |
|---|---|
|
|
The Caravan Insurance Repair Process, Step by Step
Most caravan insurance repairs follow the same eight steps. The exact process can vary slightly between insurers, so always follow any instructions your insurer gives you.
Step 1: Make Everything Safe
Your safety comes first. If the damage happened on the road, move to a safe spot if you can and check that everyone is okay. Call emergency services if anyone is injured.
If you smell gas, turn off the gas at the cylinder and keep away from flames. Disconnect power if the electrical system may be damaged. Don’t tow a caravan with damaged wheels, suspension, coupling or brakes.
Step 2: Record the Damage
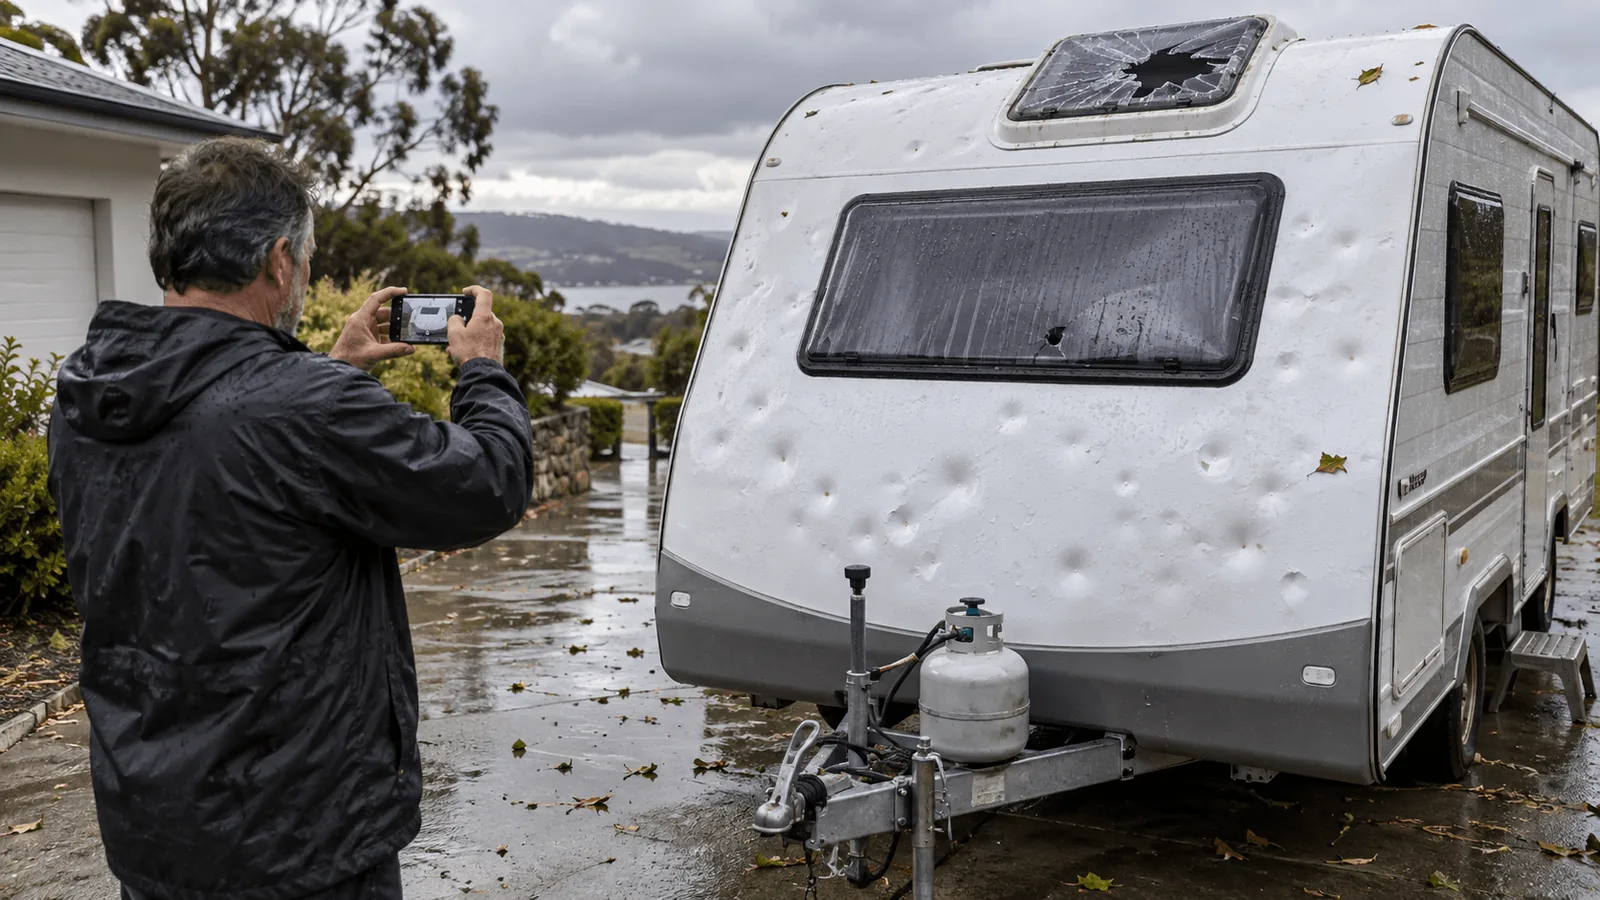
Before anything is moved, cleaned or repaired, take clear photos and videos of the damage from several angles, plus the wider scene. After a road accident, also record the other driver’s details, registration, insurer and any witness contacts.
💡 Tip: More photos are better. Photograph close-ups and wide shots, inside and outside the van. Include the date, location and weather conditions. Good records help your insurer assess the claim faster and reduce back-and-forth later.
Step 3: Notify Your Insurer
Contact your insurer as soon as possible to report the incident and lodge your claim. This is always the owner’s responsibility. The repairer cannot lodge the claim for you.
Have your policy number, photos and incident details ready. Your insurer will give you a claim number. Keep it handy, because your repairer will need it.
Step 4: Contact Your Repairer
Once your claim is lodged, contact a caravan repairer. Some policies let you nominate your own repairer, while others use an insurer-appointed repairer network. Check your product disclosure statement (PDS) or ask your insurer.
Choosing a specialist caravan repairer helps ensure the job is done properly, because caravans need specific knowledge of chassis, frames, wall panels, seals, gas and 12V systems.
Step 5: Damage Assessment and Quote
Who: Repairer. The repairer inspects the caravan, assesses and photographs the damage, and prepares a detailed quote for your insurance company. Hidden damage, such as a bent chassis or water entering through a cracked panel, is often found at this stage.
Step 6: Insurer Approval
Who: Insurer. The insurer reviews the quote and photos. For larger claims, it may send an assessor to inspect the van in person. Once the insurer approves the quote, the repair can go ahead. If extra damage is found during the repair, the repairer submits a supplementary quote for approval.
Don’t authorise repairs before your insurer approves the quote. Work done without approval may not be covered, leaving you to pay the cost yourself.
Step 7: Parts Ordered and Repairs Completed
Who: Repairer. Once the quote is approved, parts are ordered, and the repair is scheduled. Timing depends on parts availability, the extent of the damage and the workshop’s schedule. Your repairer should keep you updated along the way.
Step 8: Collect Your Caravan
Who: You. When the work is complete, the caravan is returned in working condition. Pay your excess if required, check the repairs with the repairer, and test the lights, brakes and any repaired systems before your next trip.
Caravan Insurance Repair Process Table
Use this table as a quick reference for who does what at each stage of a claim.
| Step | Who | What Happens |
|---|---|---|
| 1. Make safe | You | Check people are safe; isolate gas and power |
| 2. Record damage | You | Photos, videos, other party and witness details |
| 3. Notify insurer | You | Lodge claim, receive claim number |
| 4. Contact repairer | You | Book an assessment with your repairer |
| 5. Assess and quote | Repairer | Inspect, photograph, prepare quote for insurer |
| 6. Approval | Insurer | Review quote, may send an assessor, approve work |
| 7. Repairs | Repairer | Order parts, schedule and complete repairs |
| 8. Collection | You | Pay excess, inspect work, collect caravan |
Common Types of Caravan Damage Repaired Through Insurance
Coverage depends on your policy, but these are some of the most common reasons caravan owners make an insurance claim.
| Damage Type | Typical Repairs |
|---|---|
| Road accidents | Wall and corner panels, chassis, drawbar, suspension, lights |
| Hail | Dented walls and roof, cracked hatches, skylights and windows |
| Storms and fallen trees | Roof, awning, wall panels, windows |
| Wind | Torn or bent awnings, damaged roll-out awning arms |
| Theft and break-ins | Doors, locks, windows, stolen accessories |
| Reversing and parking bumps | Rear panels, bumpers, lights, corners |
Wear and tear, gradual water leaks and mechanical breakdowns are commonly excluded from insurance cover. These are usually handled as a standard caravan repair or, for newer vans, a warranty repair. Damaged awnings can be replaced with new caravan awnings.
Insurance Repairs vs Warranty Repairs
An insurance repair fixes damage from an insured event, such as an accident or storm. A warranty repair fixes a manufacturing fault in a newer caravan. Knowing which applies saves time when you call for help.
| Factor | Insurance Repair | Warranty Repair |
|---|---|---|
| Cause | Accident, storm, hail, theft | Manufacturing defect |
| Who pays | Insurer, minus your excess | Manufacturer |
| Who you contact first | Your insurer | Your dealer or manufacturer |
| Excess payable | Usually yes | No |
| Approval needed | Insurer approves quote | Manufacturer approves claim |
How Long Do Caravan Insurance Repairs Take?
Timeframes vary widely. Minor repairs may be completed quickly once approved, while major structural repairs can take much longer. The main factors are:
- How quickly the claim is lodged and the quote is approved
- Whether an assessor needs to inspect the van
- Parts availability, especially for imported or discontinued models
- The extent of the damage, including hidden damage found during repairs
- The workshop’s schedule during busy periods such as after a major hailstorm
Lodging your claim early, supplying good photos and responding quickly to your insurer all help shorten the timeline.
Can You Upgrade Your Caravan During an Insurance Repair?
Yes, in many cases. If your caravan is already in the workshop, it can be a good time to add upgrades such as new upholstery, solar panels or a battery management system.
Upgrades are not covered by insurance, so they are quoted and paid for separately. Ask your repairer about combining the work, or explore caravan and RV refurbishments.
What to Expect From a Good Insurance Repairer
Choose a repairer that specialises in caravans, works with your insurer, communicates clearly and follows the insurer’s recommended process. A good repairer handles the quote and paperwork with your insurer, keeps you updated, and returns your caravan safe and ready for the road.
Caravan Insurance Repairs at Focus RV
Focus RV is a Melbourne caravan and RV repair specialist in Campbellfield. The team says it has “restored all sorts of damage through our insurance repairs, with experience working across all caravan makes and models,” and that it will “stick to the recommended process to facilitate a smooth and stress-free claims experience.”
Focus RV works with a range of leading insurers, including:
| Insurance Partners |
|---|
| CIL |
| RACV |
| Rentsure |
| AAMI |
| Allianz |
| APIA |
Explore insurance repairs, caravan repairs in Melbourne, RV repairs, motorhome repairs and caravan servicing, or read the Focus RV FAQs.
Frequently Asked Questions
Who lodges the caravan insurance claim?
You do. The caravan owner is responsible for notifying the insurer and lodging the claim. The repairer then prepares the quote for the insurer.
Can I choose my own caravan repairer?
It depends on your policy. Some insurers let you nominate your own repairer, while others use a repairer network. Check your PDS or ask your insurer.
Do I have to pay an excess?
Usually, yes. Your policy excess is typically paid when the claim is settled or when you collect your repaired caravan. The amount depends on your policy.
What if more damage is found during the repair?
The repairer documents the additional damage and sends a supplementary quote to your insurer for approval before continuing.
Can I tow my caravan after an accident?
Only if it is safe. Don’t tow a caravan with damaged wheels, brakes, suspension, coupling or lights. Your insurer may arrange towing.
Does insurance cover water damage?
Sudden damage from an insured event, such as a storm, may be covered. Gradual leaks and wear and tear are often excluded. Check your policy wording.
What’s Included in a Caravan Service? A Complete Checklist
A standard caravan service focuses on the running gear that keeps you safe on the road: wheel bearings, hubs, brakes, suspension, chassis, handbrake and tyres. Most caravans should be serviced every 10,000 km or every 12 months, whichever comes first. Gas, electrical, water and seal checks are often added on top, depending on your van and how you travel.
Key Takeaways
- Service your caravan every 10,000 km or every 12 months, whichever comes first.
- A standard service covers wheel bearings, hubs, brakes, suspension, chassis, handbrake and tyres.
- Wheel bearings are repacked with grease and seals replaced. Worn bearings are replaced as required.
- Gas, 12V and 240V electrical, water systems and seals are separate checks worth adding, especially before a big trip.
- Some manufacturers require specific annual checks, such as a water ingress test, to keep your warranty valid.
- At Focus RV, a single axle service starts from $425 + parts and a tandem axle service from $525 + parts.
This guide explains exactly what happens during a caravan service, the extra checks worth adding, the warning signs that your van needs attention, and what servicing costs. Book a caravan service at Focus RV to keep your van road-ready.
What Is a Caravan Service?
A caravan service is a scheduled inspection and maintenance of the parts that carry, stop and support your caravan. Unlike a car, a caravan has no engine, so the service focuses on the running gear: the wheels, bearings, brakes, suspension and chassis.
These parts work hard on Australian roads. Heat, dust, corrugations, water crossings and long highway runs all wear down bearings, seals and brakes over time. A regular service catches small problems before they turn into a roadside breakdown or a dangerous failure.
A service is different from a repair. A service is preventative maintenance done on a schedule, while a caravan repair fixes something that has already failed or been damaged.
How Often Should You Service Your Caravan?
💡 Tip: 10,000 km or 12 months. Service your caravan every 10,000 km or every 12 months, whichever comes first. If your van sits unused for long periods, still service it yearly. Grease can dry out, and seals can perish even when the van isn’t moving.
Consider servicing more often if you regularly tow on dirt or corrugated roads, cross creeks or beaches, or carry heavy loads. Always service before a big trip, such as a lap of Australia or a long outback journey.
The Complete Caravan Service Checklist at a Glance
| Standard Service | Worth Adding |
|---|---|
|
|
What’s Included in a Standard Caravan Service?
A standard caravan service covers eight tasks across six areas. Here is what each one involves and why it matters.
1. Wheel Bearings and Hubs
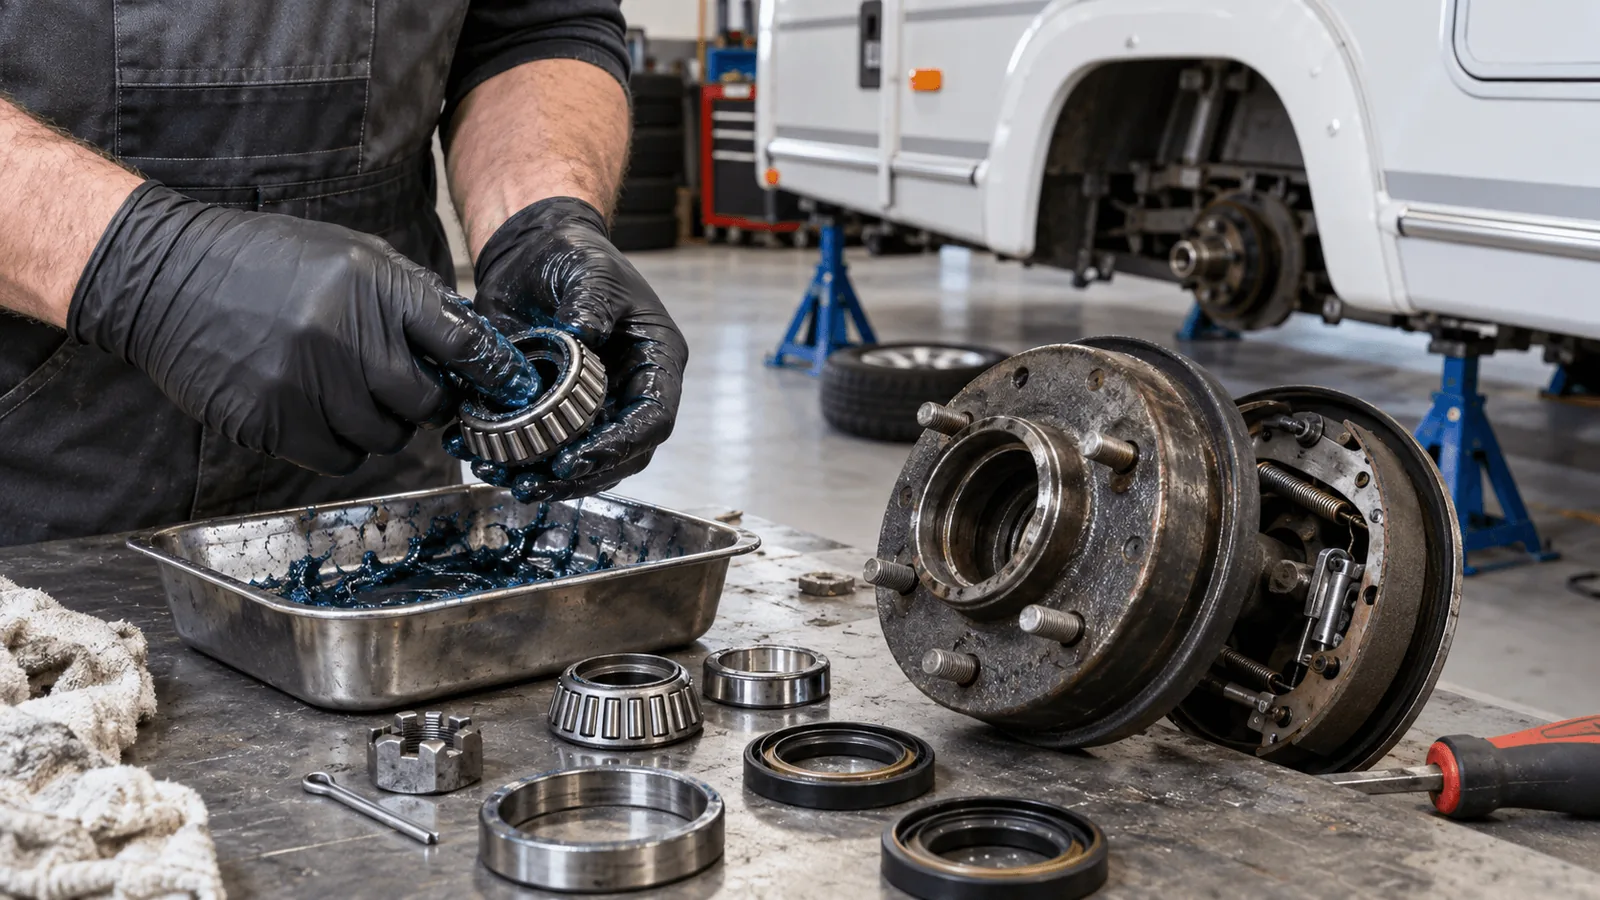
The technician removes the hubs, then cleans and inspects the wheel bearings, backing plate and brake pads. Wheel bearings let your wheels spin smoothly under load. If they run dry or wear out, they can overheat and seize, which can cause a wheel to lock or come off.
The bearings are then repacked with fresh grease and the seals replaced, with worn bearings replaced as required. Finally, the hub assemblies are reassembled and painted to protect them from corrosion.
2. Brakes
Brake operation is checked and adjusted if required. Most caravans use electric brakes, which work with a brake controller in your tow vehicle. Worn pads or poorly adjusted brakes increase stopping distances and put extra strain on your car’s brakes.
3. Suspension
Suspension components are inspected and greased as required. This includes springs, shackles, bushes and any moving parts. Worn suspension affects how the caravan tracks behind your vehicle and can lead to uneven tyre wear.
4. Chassis
All chassis components are inspected and adjusted or greased as required. The technician looks for cracks, rust, loose fittings and damage from stones or corrugations, particularly on the drawbar and around the axle mounts.
5. Handbrake
The handbrake is inspected and adjusted as required, so the caravan stays securely in place when parked or unhitched on a slope.
6. Tyres
Tyre condition and wear are inspected. The technician looks for uneven wear, cracking, bulges and low tread. Uneven wear can also point to alignment or suspension problems that need attention.
Caravan Service Checklist Table
Use this table as a quick reference for what a standard service covers and why each item matters.
| Area | What’s Checked | Why It Matters |
|---|---|---|
| Hubs | Removed, cleaned, inspected, reassembled and painted | Prevents corrosion and hidden wear |
| Wheel bearings | Cleaned, repacked with grease, replaced if worn | Prevents overheating and seized wheels |
| Bearing seals | Replaced | Keeps grease in and dirt and water out |
| Brakes | Pads and backing plate inspected, operation adjusted | Safe stopping distances |
| Suspension | Inspected and greased | Stable towing and even tyre wear |
| Chassis | Inspected, adjusted and greased | Structural safety on rough roads |
| Handbrake | Inspected and adjusted | Van stays put when parked |
| Tyres | Condition and wear inspected | Grip, blowout prevention |
Extra Checks Worth Adding to Your Service
The standard service covers the running gear. Your caravan’s living systems need attention too, especially before a long trip. Ask your service centre which of these checks are included and which are extra.
Gas System
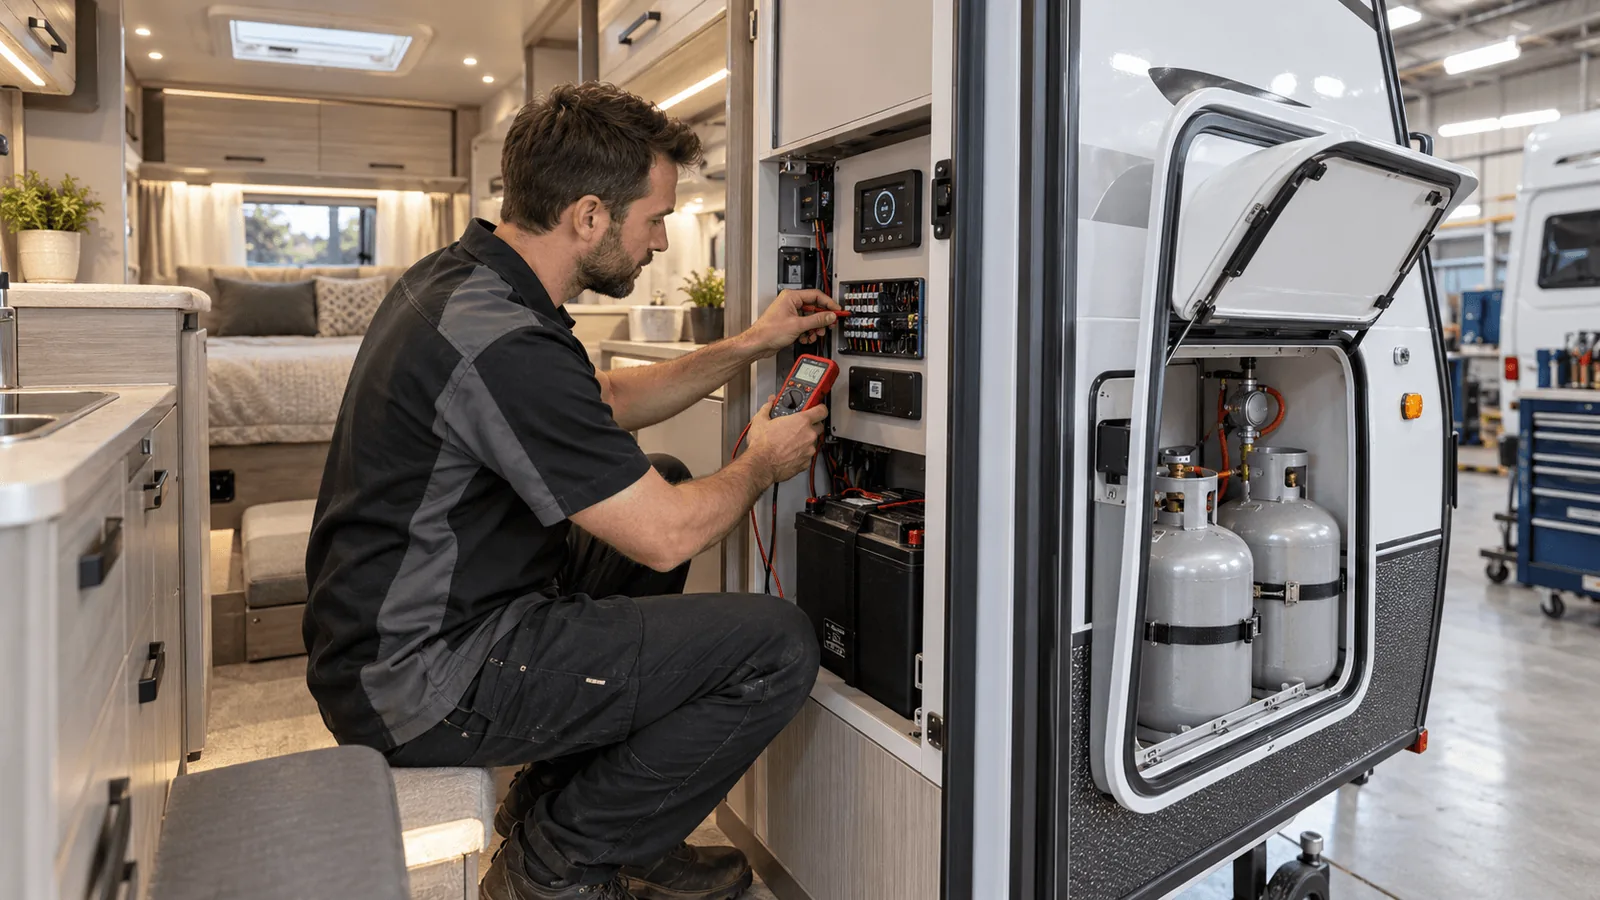
Best choice: Get it checked by a licensed gas fitter. Gas leaks are a serious safety risk. A gas check covers the cylinders, regulator, hoses, fittings and appliances. In many states, gas work must be done and certified by a licensed gas fitter.
Electrical, Batteries and Solar
Best choice: Check before every off-grid trip. A check covers 12V wiring, batteries, chargers, solar and the 240V system. A battery management system helps protect your batteries and shows how much power you have left.
Water System
Best choice: Check pumps and tanks yearly. The water pump, tanks, taps, hot water system and plumbing are checked for leaks and correct operation.
Seals and Water Ingress
Best choice: Test annually. Water leaking through window, hatch and roof seals can cause timber rot and delamination. A water ingress test finds leaks before they cause expensive caravan repairs.
Lights, Coupling and Safety Chains
Best choice: Check before every trip. Road lights, indicators, brake lights, the coupling, safety chains and the breakaway system should all work correctly.
Some manufacturers require specific checks each year to keep your warranty valid. For example, Focus RV offers the Adria Water Ingress Test and Adria Check for Adria owners. Check your warranty booklet for your manufacturer’s requirements.
Warning Signs Your Caravan Needs a Service Now
Don’t wait for your scheduled service if you notice any of these signs. Book an inspection as soon as possible.
- Grinding, rumbling or squealing from the wheels while towing
- A hot hub after driving (check carefully with the back of your hand)
- Grease leaking from the hub or onto the inside of the wheel
- The caravan pulling to one side or swaying more than usual
- Weak or uneven braking, or the brake controller showing errors
- Uneven tyre wear, bulges or cracking
- A gas smell inside or near the caravan
- Musty smells, soft spots or stains on walls, ceilings or floors, which can signal water leaks
If you smell gas, turn off the gas at the cylinder, open doors and windows, avoid any flames or switches, and have the system checked by a licensed gas fitter before using it again.
What Can You Check Yourself Between Services?
Regular owner checks keep your caravan safe between professional services. Leave bearings, brakes, gas and 240V electrical work to qualified technicians.
| Task | DIY | Professional |
|---|---|---|
| Tyre pressures and visible tread | ✓ | |
| Road lights and indicators | ✓ | |
| Coupling, chains and jockey wheel | ✓ | |
| Window and hatch seals (visual check) | ✓ | |
| Wheel bearings and hubs | ✓ | |
| Brake adjustment | ✓ | |
| Suspension and chassis inspection | ✓ | |
| Gas system work | ✓ (licensed gas fitter) | |
| 240V electrical work | ✓ (licensed electrician) |
How Much Does a Caravan Service Cost?
The cost depends mainly on how many axles your caravan has, plus any parts needed. At Focus RV, service pricing at the time of writing is:
| Service | Price | Notes |
|---|---|---|
| Single axle caravan service | $425 + parts | Covers the full standard service checklist |
| Tandem axle caravan service | $525 + parts | Two axles, so twice the hubs, bearings and brakes |
| Adria Water Ingress Test | $330 | Annual requirement for Adria warranty |
| Adria Check | $330 | Annual requirement for Adria warranty |
Parts such as replacement bearings, seals or brake components are charged separately. Check current pricing on the caravan service page or contact the team for a quote. Genuine caravan parts are also available.
Why Regular Caravan Servicing Matters
A regular caravan service keeps you safe on the road, protects your warranty, prevents costly breakdowns far from home and helps your caravan hold its value. Service every 10,000 km or 12 months, add gas, electrical and seal checks before big trips, and book an inspection straight away if you notice any warning signs.
Caravan Servicing at Focus RV
Focus RV is a Melbourne caravan and RV specialist in Campbellfield. The team says customers can “drive away with peace of mind, knowing all our servicing is undertaken by qualified mechanics.” Focus RV is also an authorised warranty agent for several local manufacturers.
| Service | What’s Included |
|---|---|
| Caravan servicing | Bearings, hubs, brakes, suspension, chassis, handbrake and tyres |
| Warranty repairs | Authorised warranty work for several local manufacturers |
| Caravan repairs | Repairs to structural, water damage and running gear issues |
| Insurance repairs | Accident, storm and hail repair work |
| Accessories and power | Batteries, battery management systems and accessories |
| Caravan & RV storage | Secure storage between trips |
Explore caravan servicing in Melbourne, warranty repairs, Jayco caravan repairs, insurance repairs and caravan and RV storage, or read the Focus RV FAQs.
Frequently Asked Questions
How often should a caravan be serviced?
Every 10,000 km or every 12 months, whichever comes first. Service more often if you regularly travel on rough, dusty or wet roads.
How long does a caravan service take?
A standard service is usually completed within a day, depending on the workshop’s schedule and whether parts need replacing. Ask your service centre for a turnaround time when you book.
Does a caravan service include a gas check?
Not always. A standard service focuses on the running gear. Ask whether a gas check is included, and make sure any gas work is done by a licensed gas fitter.
Do I need to service my caravan to keep the warranty?
Most manufacturers require regular servicing, and some require specific annual checks such as a water ingress test. Check your warranty booklet and keep all service records.
What is the difference between a single axle and tandem axle service?
A tandem axle caravan has two axles, so there are twice as many hubs, bearings and brakes to service. That is why tandem axle services cost more.
Can I service my caravan myself?
You can do basic checks like tyre pressures, lights and seals. Wheel bearings, brakes, gas and 240V electrical work should be done by qualified technicians.
Caravan Refurbishment vs Buying New: Which Makes More Sense?
Refurbishing makes more sense when your caravan has a sound chassis and frame, no major water damage, and a layout you already like. Buying new makes more sense when the structure is failing, repairs would cost close to the price of a replacement, or you need a completely different size or layout. For many owners, a targeted refurbishment delivers a modern, comfortable van for a fraction of the cost of a new one.
Key Takeaways
- A refurbishment usually costs far less than a new caravan and lets you keep a van you already know and like.
- The chassis, frame and walls decide everything. A sound structure makes a caravan worth refurbishing.
- Widespread water damage, rot or delamination can make a refurb uneconomical. Get an inspection first.
- Buy new if you need a different size, layout or off-road capability that your current van cannot deliver.
- Popular refurb upgrades include upholstery, curtains and blinds, kitchens, bathrooms, bed conversions and solar.
- Rule of thumb: if repairs and upgrades approach half the price of a comparable new van, compare both options carefully.
This guide compares refurbishing and replacing a caravan on cost, value, time and lifestyle fit. It explains how to tell whether your van is worth refurbishing, which upgrades add the most value, and when buying new is the smarter choice. See the caravan and RV refurbishment services at Focus RV for what is possible.
What Is a Caravan Refurbishment?
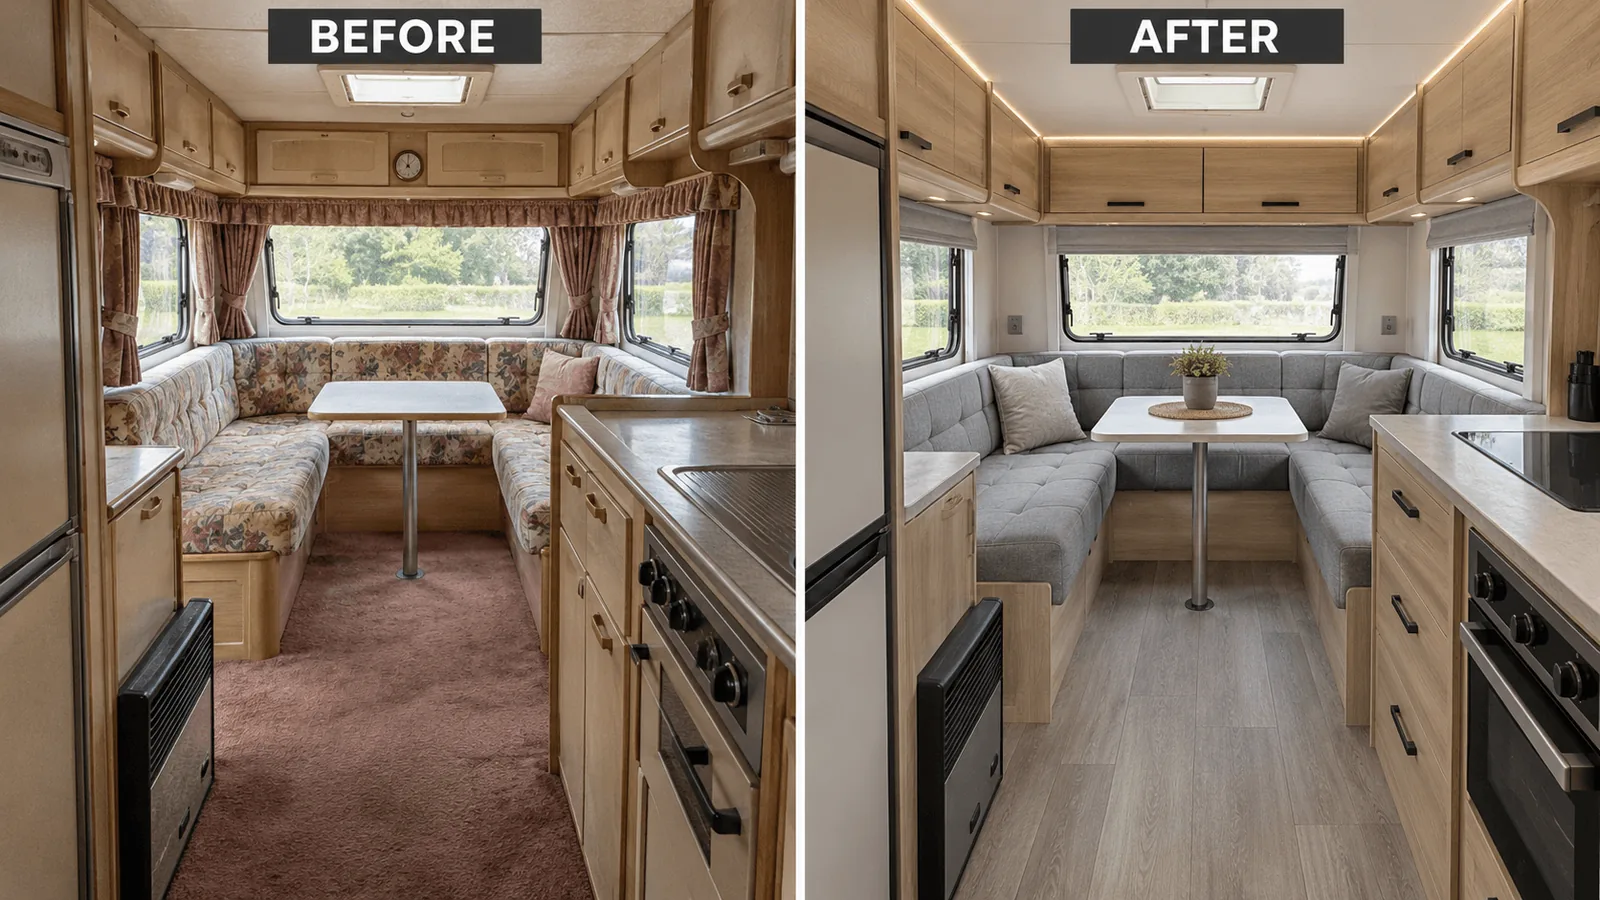
A caravan refurbishment is the process of repairing, updating and upgrading an existing caravan so it looks, feels and functions like a newer van. It can be as simple as new curtains and upholstery, or as extensive as a full interior rebuild.
Refurbishments typically fall into three levels:
- Cosmetic refresh: new upholstery, curtains, blinds, flooring, paint and lighting.
- Functional upgrade: kitchen and bathroom improvements, bed conversions, solar panels, batteries and appliances.
- Full refurbishment: a complete interior strip-out and rebuild, often combined with structural and water damage repairs.
Many owners start with a cosmetic refresh and add functional upgrades over time, spreading the cost across seasons.
Caravan Refurbishment vs Buying New at a Glance
| Refurbish | Buy New |
|---|---|
|
|
Key Differences Between Refurbishing and Buying New
The main difference is cost versus certainty. A refurbishment saves money and keeps what you like about your van, while a new caravan costs more but comes with a warranty, the latest features and no hidden history.
| Factor | Refurbish | Buy New |
|---|---|---|
| Upfront cost | Lower, scaled to the work you choose | Highest |
| Depreciation | Minimal, value already absorbed | Steepest in the first few years |
| Customisation | Built around how you travel | Limited to factory options |
| Warranty | Workmanship warranty on new work | Full manufacturer warranty |
| Latest features | Added selectively (solar, lithium, LED) | Included as standard |
| Time to get on the road | Weeks, depending on scope | Immediate if in stock, months if ordered |
| Risk | Hidden damage may be found during work | Low, but new-van defects can occur |
| Environmental impact | Lower, reuses an existing van | Higher |
How Much Does Each Option Cost?
A refurbishment typically costs a fraction of a new caravan. The figures below are a general guide only and vary with the van’s size, condition and the materials you choose. Always get a written quote.
| Option | Indicative Cost (AUD) | What You Get |
|---|---|---|
| Cosmetic refresh | $3,000 – $10,000 | Upholstery, curtains, blinds, flooring, lighting |
| Functional upgrade | $10,000 – $25,000 | Kitchen or bathroom updates, bed conversion, solar and batteries |
| Full refurbishment | $25,000+ | Complete interior rebuild, often with structural repairs |
| New entry-level caravan | $40,000 – $60,000 | Basic on-road van, standard layout |
| New mid-range to premium caravan | $70,000 – $150,000+ | Larger layouts, off-road builds, premium fit-out |
These ranges are indicative only and are not quotes. Hidden damage found during a refurbishment can add to the cost, so budget a contingency of around 10–20%.
When Refurbishing Makes More Sense
Refurbishing is the better choice when your caravan is structurally sound, and you mainly want it to look better, feel more comfortable or work better off-grid.
Your Chassis and Frame Are Sound
Best choice: Refurbish. A solid chassis, straight frame and dry walls are the foundation of a good refurbishment. If these are in good condition, almost everything else inside the van can be updated.
You Love the Layout
Best choice: Refurbish. If the floor plan already suits you, there is no need to pay for a new van to get it. A refurbishment keeps the layout and replaces tired finishes, or makes targeted changes such as a bed conversion.
You Want Custom Features
Best choice: Refurbish. New caravans come with set factory options. A refurbishment lets you choose exactly what you want, from upholstery and window tints to solar panels and battery systems.
You Want to Avoid Depreciation
Best choice: Refurbish. New caravans typically lose value fastest in their first few years. An older van has already absorbed most of that loss, so money spent on quality upgrades goes into comfort rather than depreciation.
When Buying New Makes More Sense
Buying new is the better choice when the cost of fixing your van approaches its replacement value, or when your needs have changed beyond what a refurbishment can deliver.
Major Structural or Water Damage
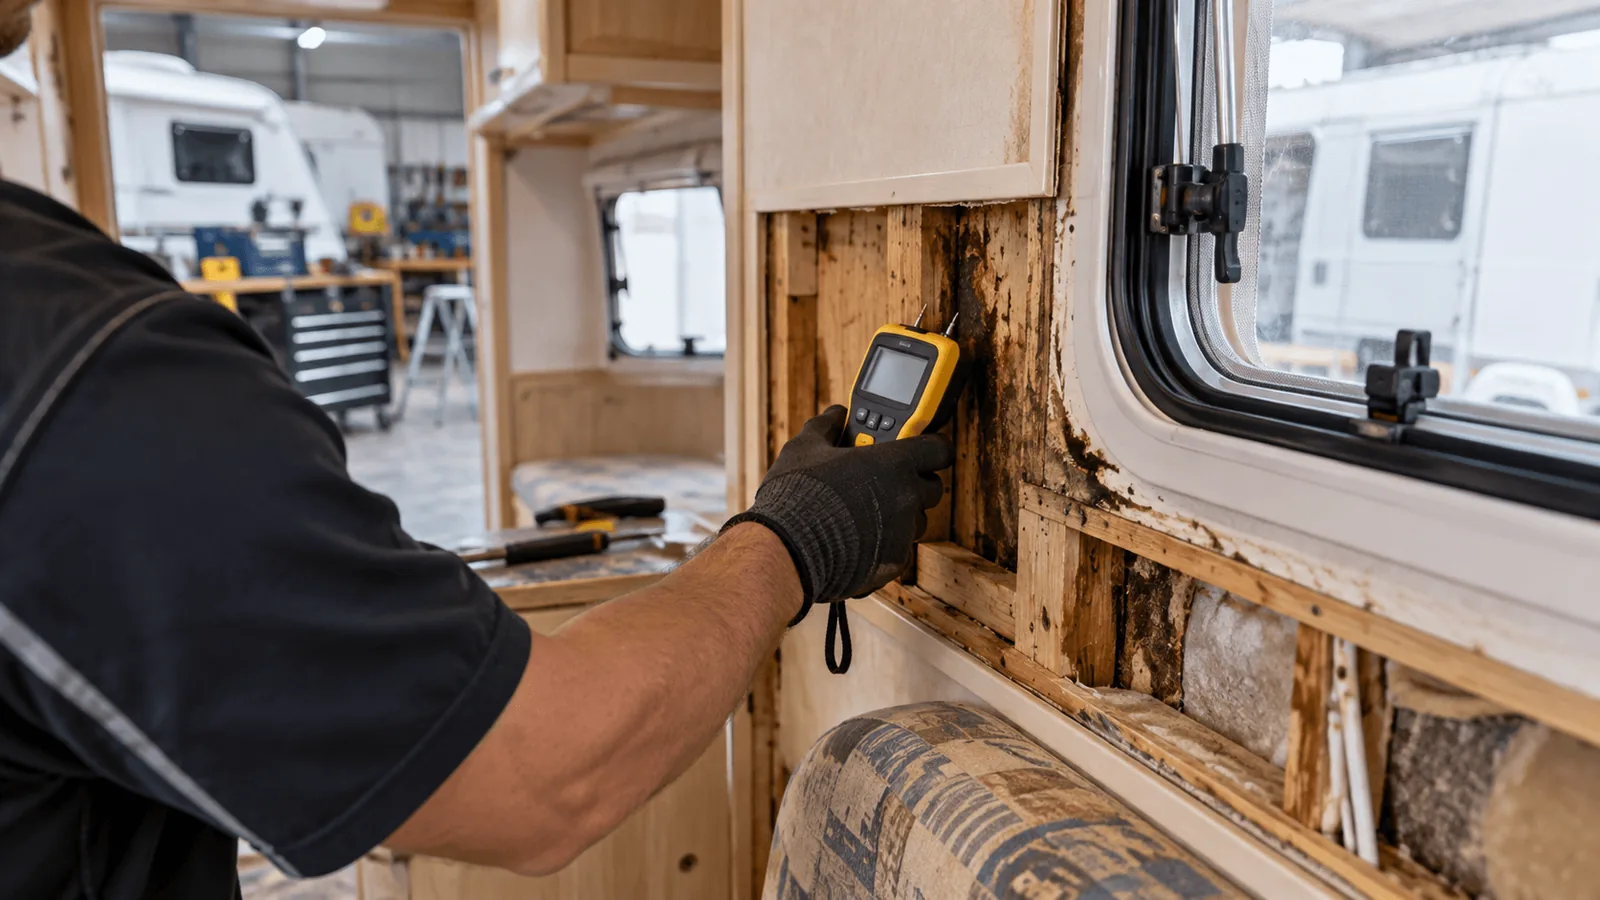
Best choice: Buy new. Widespread timber rot, severe delamination or a damaged chassis can make a refurbishment uneconomical. A caravan repair specialist can assess the extent of the damage before you decide.
You Need a Different Size or Layout
Best choice: Buy new. If your family has grown, you need bunks, or you want an ensuite your van cannot fit, a different caravan may be the only practical answer.
You Are Heading Off-Road
Best choice: Buy new. An on-road van cannot easily be turned into a true off-road caravan. Heavy-duty chassis, suspension and clearance are built in at the factory.
You Want a Full Warranty
Best choice: Buy new. If peace of mind matters most, a new van’s manufacturer warranty covers the whole caravan, not just the parts that were replaced.
Is Your Caravan Worth Refurbishing?
💡 Tip: Get an inspection before you decide. A professional inspection reveals hidden water damage, frame condition and electrical issues. It is the single best way to know whether a refurbishment will be money well spent.
Use this quick checklist. The more boxes you can tick, the stronger the case for refurbishing:
- ☐ The chassis is straight and free of heavy rust
- ☐ Walls, floor and roof show no soft spots, swelling or musty smells
- ☐ Window and hatch seals are intact with no signs of leaks
- ☐ The layout still suits the way you travel
- ☐ The van is the right size and weight for your tow vehicle
- ☐ The van is registered and roadworthy, or close to it
If several boxes stay unticked, especially the structural ones, compare the full repair cost against a replacement before committing.
Refurbishment Upgrades That Add the Most Value
The best-value upgrades improve comfort, function and off-grid ability. These apply to most caravans and RVs.
| Upgrade | What It Does |
|---|---|
| Upholstery and curtains | Instantly modernises the interior and improves comfort |
| Blinds and window tints | Reduces heat and glare, adds privacy |
| Kitchen improvements | More bench space, better storage and modern appliances |
| Bathroom improvements | Updated fittings, better ventilation and easier cleaning |
| Bed conversions | Turns bunks or dinettes into more comfortable sleeping |
| Solar panels and batteries | More time off-grid without a powered site |
| Bike racks and accessories | Adds practical storage for your travel style |
Browse more caravan accessories in Melbourne or ask about caravan awnings to finish your refurbishment.
Refurbishing After Damage or an Insurance Claim
If your caravan has been damaged in an accident, storm or hail event, a repair can often be combined with a refurbishment. This lets you restore the damaged areas and upgrade the rest of the van at the same time.
Focus RV handles insurance repairs and warranty repairs. Talk to your insurer first to confirm what is covered, then discuss any additional upgrades separately.
Which Option Should You Choose?
Refurbish if your caravan is structurally sound, the layout suits you and you want a modern, comfortable van without the cost of a new one. Buy new if the structure is failing, repair costs approach replacement value, or you need a different size, layout or off-road capability.
Before deciding, get a professional inspection, compare a written refurbishment quote with the price of a comparable new van, and consider how you will use your caravan over the next five to ten years.
Frequently Asked Questions
Is it worth refurbishing an old caravan?
Yes, if the chassis, frame and walls are in good condition. A refurbishment can give you a modern, comfortable van for much less than a new one. If there is major structural or water damage, compare the repair cost against buying new.
How long does a caravan refurbishment take?
It depends on the scope. A cosmetic refresh may take days to a couple of weeks, while a full refurbishment with repairs can take several weeks. Your refurbisher can give you a timeline with your quote.
Does refurbishing a caravan increase its value?
Quality upgrades can improve resale appeal, especially modern interiors, solar and battery systems. However, you rarely recover the full cost at sale, so refurbish mainly for your own use and enjoyment.
Can you refurbish a caravan with water damage?
Often, yes. Localised water damage can usually be repaired as part of a refurbishment. Widespread rot or delamination is more costly and may make buying new the better option.
What is the most popular caravan refurbishment?
Upholstery, curtains and blinds are among the most popular because they transform the look of the interior at a relatively low cost. Solar panels and battery upgrades are also in high demand for off-grid travel.
Can I refurbish my caravan in stages?
Yes. Many owners start with a cosmetic refresh and add kitchen, bathroom or solar upgrades later. Staging the work spreads the cost across seasons.
Caravan Refurbishments at Focus RV
Focus RV is a Melbourne caravan and RV specialist based in Campbellfield. The team helps owners turn their van into “a fully refurbished second home, with a range of modifications and interior solutions available.”
| Service | What’s Included |
|---|---|
| Caravan & RV refurbishments | Curtains, upholstery, window tints, kitchens, bathrooms, bed conversions, blinds |
| Solar and power upgrades | Solar panels, batteries and battery management systems |
| Repairs and fit-outs | Structural and interior repairs, custom fit-outs |
| Insurance and warranty repairs | Accident, storm and warranty repair work |
| Caravan servicing | Regular servicing to keep your van road-ready |
Explore caravan refurbishments, caravan servicing, repairs and fit-outs and caravan and RV storage, or read the Focus RV FAQs.